Doctor's sausage at home recipe. Recipes for making doctor's sausage according to GOST Doctor's sausage at home according to GOST
Cooked sausage “Doctorskaya” at home
 “Doctorskaya” sausage is probably the most popular boiled sausage in the USSR and in the post-Soviet space. This sausage was loved by people of all social and age categories. The food industry of the USSR is closely connected with the name of Anastas Mikoyan. Since 1926, he was appointed People's Commissar (People's Commissar) of foreign and domestic trade of the USSR, then in 1930 the People's Commissariat was divided into the People's Commissariat of Foreign Trade and the People's Commissariat of Supply. In 1934, the People's Commissariat of Supply was divided into the People's Commissariat of Internal Trade and the People's Commissariat of Food Industry, the latter headed by A. Mikoyan. In this post, in 1936, he visited the United States to familiarize himself with the latest technologies in the food industry. The result of A. Mikoyan’s activities as People’s Commissar was the foundation of the First Moscow Sausage Plant meat processing plant in 1931 and its launch on December 31, 1933. A year later, the meat processing plant was named after People's Commissar Mikoyan. Nowadays it is CJSC Mikoyanovsky Meat Processing Plant.
In parallel with the work to establish the food industry of the USSR, work was actively carried out to create recipes and technological documentation for the production of Soviet sausages. This was done by the All-Russian Research Institute of Meat Industry, founded in 1930. One of the first was the boiled sausage “Doctorskaya”. The first documentary publication of the recipe for the “Doctor’s” sausage was in the illustrated album “Sausages and Smoked Meats”, Pishchepromizdat, Moscow-Leningrad, 1938, compiled by A.G. Konnikov. This album was intended for engineering and technical personnel of sausage factories and stores selling sausages and smoked meats. It was this album that formed the basis of GOST 3324-46 “Boiled sausages. Technical conditions", and GOST 3324-46 became the state standard for the production of boiled sausages. The recipe for Doctorskaya sausage was developed as a recipe for a dietary product with a reduced fat content. This sausage was intended as a dietary (therapeutic) food for patients with somatic signs of the consequences of long-term starvation (specifically, “...patients with poor health as a result of the Civil War”). The production of Doktorskaya sausage began in 1936 at the Moscow Meat Processing Plant named after. A. I. Mikoyan."
To this day, “Doctor’s” sausage is popular and loved. But over time, the old, time-tested, Soviet GOST standards were simplified and replaced by new ones, in which, under the influence of modern economic conditions, production technologies changed, and not always for the better. The quality of their favorite sausage was falling, and at one “wonderful” moment, customers realized that this was no longer the same sausage they had loved since childhood. Good sausage is still produced today, but not everyone can distinguish it from cheap “analogues”, and it’s not even about the price of the sausage.
But if you have the desire, then good and even excellent boiled sausage can be made at home. I won’t say that it’s completely simple, but it’s quite possible. In this article we will tell you how to prepare boiled “Doctor’s” sausage using the simplest tools that every home cook probably has (meat grinder, refrigerator, gas (or electric) stove with oven, mixer, double boiler). Perhaps you even have a sausage stuffer (you will need it), but if not, then the issue can be solved with a very small amount of money (500-600 rubles) and the purchase of a simple plastic one. Despite its toy appearance, this is a very convenient tool for the home sausage maker. Convenient to use (one person can handle stuffing sausages without any problems), especially good for stuffing lamb and thin pork casings, easy to wash after use, and takes up very little space when disassembled. As Doctor Bykov (TV series “Interns”) said, “Not a patient, but just a souvenir!”
You will also need a sausage casing. There is a large choice here - from natural casings (beef blues, pork bladders) to synthetic casings (collagen, polyamide, polymer, etc.). I prefer pork bladders the most. Sufficiently capacious - 800-1500 g, very strong (collagen casings can burst during cooking), neat round shape of the finished sausage - almost regular-shaped balls. By the way, in that very memorable Soviet GOST 3324-46, pork bladders are recommended as casings, and in the album “Sausages and Smoked Meats” they are the only ones mentioned as casings.
You will also, of course, need meat (beef and pork). The meat should be good, preferably with a minimum of veins and all kinds of cartilage and connective tissue, not weathered. With good natural color, no unpleasant smell. The best one, of course, is farm-grown, but vacuum-packed is also quite suitable.
And, of course, spices and seasonings. You can collect everything you need yourself - nitrite salt, sugar, ground cardamom (or nutmeg), eggs and milk. Or you can skip the hassle and buy a ready-made mixture. When making home-cooked sausages, in addition to nitrite salt, it is also recommended to use phosphates. There is an ongoing debate between supporters and opponents around these two components. A certain part of the sausage makers believe that homemade sausages should not contain these chemical compounds (and, by the way, others - dextrose/glucose, maltodextrin, dried egg melange, powdered milk, ascorbic acid), since home production using “all sorts of E-additives” loses its meaning. It’s easier to buy in a store and not get your dishes and hands dirty. Supporters, on the contrary, perceive “chemistry” quite loyally and with understanding. Well, let's start with the fact that dextrose/glucose, maltodextrin, dry melange, milk powder and ascorbic acid are natural products. Dry melange and milk are freeze-dried products made from natural raw materials. Dextrose (aka glucose) and maltodextrin, despite their “chemical” and “pharmacy” names, are also natural products, except that they are a product of sugar processing. Well, ascorbic acid is understandable, although it can be synthesized artificially. What remains is nitrite salt and phosphates. Nitrite salt can indeed not be used in boiled sausages, since its main purpose is an antimicrobial effect against the microorganisms of botulism, salmonella, staphylococcus and partial suppression of the development of toxigenic molds. But since the sausage undergoes heat treatment, the benefit of nitrite salt in boiled sausage is its ability to give finished meat products a pink “meaty” color and a “ham” taste. If nitrite salt is not used, then the boiled sausage (or frankfurters/wieners) will not have a pink color when cut, but a gray color, which, in my opinion, is at least not appetizing. Anti-chemicals color their homemade sausages with fermented red rice or beet juice. Well, there are phosphates left. In my opinion, this is a necessary substance for the modern home sausage maker. Of course, this point of view is not the ultimate truth; everyone makes their own choice. This chemical compound is primarily a moisture- and fat-binding substance and is necessary to prevent the formation of broth-fat edema when cooking sausage. Even experienced sausage makers are not immune from this incident (unless they use phosphates), since this phenomenon depends on many components - from the experience of the sausage maker, as well as a number of meat properties invisible to the eye, which negatively affect the quality of the sausage, to compliance, albeit not very complex technological processes. The swelling does not affect the taste of the finished sausage, except that the sausage will turn out drier, and if the sausage casing is damaged, liquid will ooze out, and the presentable appearance of such sausage is extremely low. With the use of phosphates, you almost don’t have to worry about swelling; sausages (frankfurters, wieners) will turn out juicy, tender, with good color and aroma. And finally, phosphates prevent microbial growth and oxidative processes during storage of finished products. In general, everything is good in moderation.
By the way, the shelf life of boiled sausages according to GOST 23670-79 was only 72 hours. And finally, home-cooked sausages really don’t last long, literally 5-7 days, so there’s no need to prepare such sausages “in reserve.”
We will assume that everything we need is available.
We will need(for about 1100 g of finished sausage):
- lean beef (trimmed) - 250 g,
- lean pork (no more than 30% fat, trimmed) - 700 g (or lean pork (ham) 500 g + back fat 200 g),
- (as an option, a mixture of nitrite salt and table salt 50%x50%) - 21 g,
- - 1 package (32 g),
- dried pork bladder with a capacity of up to 1.5 kg – 1 pc.,
- ice (very cold) water or crushed ice – 200-250 ml.
By the way, household cutters have recently become available for sale at a cost of approximately 3500-4000 rubles. along with delivery. This device was offered to the market, of course, by our Chinese friends, and this tool can be purchased on a well-known Chinese resource with delivery to Russia. In terms of its functionality, it can replace a cutter and a mixer (planetary mixer).
I repeat, this recipe is for preparing boiled Doctor’s sausage at home using available means (a regular meat grinder, a stove with oven, a mixer), i.e. without cutter, tabletop planetary mixer and other devices. I can’t call the finished result GOST sausage, and not because it turned out worse. The sausage is very tasty, the color and smell match, the texture is elastic. But, nevertheless, there are, of course, differences, albeit minor ones. But I think this article will be of interest to beginning sausage makers, and primarily to those who have not yet had time to spend 50,000 or even more rubles on equipment for preparing their favorite sausages at home.
|
Meat for minced meat is first seasoned (veins, cartilages, etc. are removed). Using a sharp knife, carefully cut out the veins from the pieces of meat. Use a knife to pry the edge of the vein and, holding the knife blade parallel to the vein, make short movements back and forth with the knife blade, like a saw, and separate the meat from the vein. Trim the fat from the pork too. Then place the trimmed meat and lard in the freezer to freeze. The meat should be very cool, but not frozen into stone. Cut the frozen meat into small pieces; in this form it will be convenient to pass it through a meat grinder. |
|
Next, grind the cooled meat through a meat grinder on a grid with the largest mesh, most likely it will be a standard mesh of 5-6 mm. Place the minced meat in a container of suitable volume and add the curing mixture (nitrite salt or a mixture of nitrite salt and table salt 50% x 50%). |
|
Stir the minced meat until a more or less homogeneous mass is obtained and the salt is evenly distributed. Cover the container with a lid or cling film and put it in the refrigerator to mature the minced meat at a temperature of 2-4°C for 48-72 hours. This temperature is given by refrigerators in the “zero zone”. |
|
After the allotted time, the minced meat is “ripe” and ready for further processing. It darkened on top and became redder inside. |
|
We pass the marinated minced meat through a meat grinder, maybe a couple of times. But the main thing is not to get carried away, the temperature of the minced meat should not rise above +14⁰С. After passing through the meat grinder, the minced meat can be placed in the freezer for now. |
|
Now it's the turn of lard. We take the lard out of the refrigerator and put it through a meat grinder. |
|
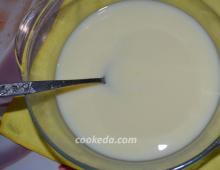
And now comes the most difficult moment - the formation of minced meat for sausage. We take the minced meat out of the freezer and pass it through the meat grinder along with the lard again. Then we transfer the minced meat into a tall container suitable in volume, add “FSBN Seasoning for Cooked Sausage “Doctorskaya” (1 package is designed for 1 kg of minced meat). This seasoning already contains all the necessary components for boiled sausage “Doctorskaya” - dry egg melange, powdered milk, natural spices and a phosphate composition, and the abbreviation FSBN indicates that this particular functional mixture does not contain nitrite salt. Next, we begin to mix the minced meat with seasoning (functional mixture) until it dissolves in the minced meat, first with our hands. Although the minced meat is cold, the seasoning will quickly mix with the minced meat, literally in 1 minute of stirring. Then we begin to add ice (very cold) water or crushed ice to the minced meat in parts; according to the recipe, this is 200-250 ml. Mix the minced meat with water first with a mixer using spiral attachments for thick dough until all the water is completely absorbed. Then we change the attachments on the mixer to whipping attachments and continue mixing the mass at low speed, while monitoring the temperature of the minced meat. You should get a paste-like sticky mass of pale pink color. This is probably the most difficult process in preparing “Doctor’s” sausage without the use of a cutter and a tabletop planetary mixer. During mixing, you need to ensure that the temperature of the minced meat does not exceed +14⁰C. If this does happen, you need to place the container with minced meat in the freezer for 30 minutes. |
|
Since we decided to use pork bladder to prepare the boiled “Doctor’s” sausage (and it comes in dried form), it must first be soaked for 2 hours or more, changing the water every 30 minutes. The dried bladder will soak, regain its former elasticity and firmness, and at the same time get rid of the characteristic odor. After all, it’s a bladder. So, the prepared bubble remains to be filled with minced meat. And here we need a sausage stuffer. Whoever has it, take it and use it according to the instructions. Well, for those who don’t have it, it would be nice to worry in advance and buy it. As I said above, a great help for a home sausage maker is a mini-syringe, cheap and cheerful, and also convenient. A great thing, unless, of course, you are engaged in the production of sausages that exceed your household needs. There is no need to fill the bubble with minced meat to the top. You need to leave room for tying the neck so that there is some space left inside. When cooking the sausage, the minced meat will increase in volume. |
|
Tie the neck of the bubble tightly with twine and make a loop so that you can hang the filled bubble. |
|
We hang the bubble by the loop to hang at a temperature of +2-4°C for 16-24 hours. I have a refrigerator for this purpose. I had to make room. |
|
And finally, heat treatment. Start by roasting. Modern stoves with electric ovens are perfect for this. For many ovens, the heating regulator starts at +50⁰С – that’s what you need. It is also suitable if you have an electric mini-oven at home. However, their heating regulator starts from +100⁰С. Well, yes, that’s not a problem. Set the heat to low and open the door. Fry the filled bubble for 90-100 minutes at a temperature inside the oven of 90-100⁰C. The temperature inside the bubble should be 40-50⁰С (when the temperature inside the bubble reaches this level, the heat treatment in the oven can be considered complete). How to measure the temperature inside? Meat thermometer. Don't have a thermometer? You don’t have to measure, because this is not all heat treatment. The main task of frying is to form the top layer of the future sausage, and not to bring the meat to full readiness. At this stage, coagulation of minced meat proteins occurs and the formation of a “protein skin” or crust. The fried bubble should have a completely dry, reddened surface. |
|
Well, the final stage of heat treatment is cooking the sausage. I solved the cooking issue very simply - I cooked the bubble in an electric steamer. Great option. Place the bubble in the steamer container, cover with a lid, leave for 1 hour 20 minutes and that’s it. During this time, the temperature inside the bubble reaches the required 68-70⁰C, and this fact indicates that the sausage is ready, i.e. cooked. Which is exactly what we need. Turn off the steamer, open the lid and let the ball cool slightly. |
|
Then we bathe the ball in very cold running tap water for about 10 minutes, after that we catch the ball from the water, carefully wipe it dry with a towel and leave it to dry for 2 hours at room temperature. Then put it in the refrigerator overnight at a temperature of +2-4°C. And the next day…….we try. |
|


step by step recipe with photos
Of course, to make doctor’s sausage at home as close as possible to what we see on store shelves, you need to try. It is better to free up the whole day for cooking, since the culinary process takes place in several stages. But the finished sausage will pleasantly surprise you and, most likely, you will never touch store-bought sausage again - homemade sausage is much tastier, considering that it does not contain harmful additives.
Ingredients
- 700 g pork shoulder
- 250 g beef
- 14 g nitrite salt
- 6 g table salt
- 50 g milk powder
- 1 chicken egg
- 1 g ground nutmeg
- 3 g phosphates
- 1 m of collagen casing with a diameter of 55 mm
How to make doctor's sausage
 1. Prepare the meat - you can take beef pulp or balyk. The shoulder blade should also not be greasy or contain bones - cut them out if there are any.
 2. For more convenient grinding of meat in a meat grinder, cut it into pieces of any shape.
 3. In one bowl, but without mixing, toss first the beef and then the pork. Place the bowl of minced meat in the freezer so that the minced meat freezes a little - then it will be easier to blend it in a blender.
 4. After an hour (or maybe less), transfer the ground beef to the food processor bowl. Add nitrite and table salt, phosphates, and ground nutmeg to it. Doctor's sausage, prepared according to GOST, does not contain any other spices. Nitrite salt is a salt with sodium nitrite that retains its appetizing pink color and imparts a “ham” flavor. Phosphates retain moisture, making the sausage juicy. Both salt and phosphates can be ordered online in specialized stores or purchased nearby if you are lucky and there are such stores in your city.
 5. Blend the ground beef in a food processor or blender for 3-4 minutes until a smooth emulsion forms. Now put the minced pork into the bowl and stir for another 3-4 minutes.
 6. Add dry milk to the bowl and beat in a chicken egg. Twist again, this time a minute is enough. During grinding, make sure that the temperature of the minced meat does not rise above 10 degrees. It's good if you have a thermometer. And if you don’t have it, then throw a couple of ice cubes into the bowl while chopping - just to be sure. If the minced meat is overheated, then during cooking the sausage, broth swelling may occur - this is when a lot of broth forms inside the casing, in which a “dry” cutlet floats. This, of course, is also tasty, but it has nothing in common with sausage.
 7. Now you will need an attachment for a meat grinder to make sausage - you can purchase it at any hardware or kitchenware store for a nominal cost. The collagen shell must be soaked in warm water for 10-15 minutes in advance. The shell can be bought in the same place where you buy salt with phosphates. Tie one end of the casing with twine or cooking thread, place it on the nozzle and try to release as much air as possible. Turn the meat grinder handle to push the mince through and fill the casing. Here, perhaps, a helper would be helpful.
 8. From the specified amount of ingredients you will get three loaves of sausage. Therefore, you can immediately cut the entire shell into 3 parts and when the opposite edge of the shell appears, press the minced meat, releasing as much air as possible and tie the other end tightly.
Fill the pan with water, place the sausage in a strong plastic bag and place it in the pan. It would be convenient to have a probe thermometer at home. You can put the probe in the pan and monitor the water temperature. According to technology, the water temperature should not rise above 80 degrees. The sausage will be ready when the internal temperature reaches 70 degrees. It will take about 80 minutes to cook this amount of sausage. If you don’t have a thermometer, you can do this - when the water almost boils, add a little cold water and turn it off for 5-7 minutes. Then turn it on to a very low heat and after 15 minutes turn it off again for 5 minutes. And so count down 80 minutes. It may seem difficult, but the results are worth it.
 9. When the sausage is cooked, remove it and let cool for an hour or two. Then you can cut it and try it - this sausage will not leave you indifferent, it is simply magnificent! Cooked sausage can be stored in the refrigerator for 72 hours, after which it may spoil.
Doctor's sausage recipe from 1936 remains a favorite delicacy for many to this day. Dietary sausage includes vitamins and minerals necessary for a healthy and fulfilling life.
Ingredients
- Premium beef without veins - 250 g;
- Pork shoulder - 750 g;
- Table salt - 10 g;
- Whole cow's milk - 200 ml;
- Sugar - 1 g;
- Seasoning for boiled sausage Doctorskaya - 3 g or spices: ground nutmeg - 1 g, ground cardamom - 0.5 g;
- Collagen casing 65 mm caliber or collagen casing of any other caliber;
Equipment
- Meat grinder attachment or sausage stuffer
Doctor's Sausage Set
Recipe
1. Pass the meat through a fine wire rack 2 times, do not allow the minced meat to heat above 12ºC (cool in the refrigerator after each time).
2. Mix all the spices, sugar and add to the minced meat. Mix the minced meat thoroughly, then put it in the refrigerator for 6-12 hours.
3. Beat the minced meat with a blender to a sticky consistency, adding ice milk, avoiding heating the minced meat.
4. Soak the collagen casing (caliber 45, 55, 65, 80, 100 mm) in warm water (37-40°C) for 5-10 minutes. For Doctor's sausage, you can use other casings if desired.
5. Fill the loaves with prepared minced meat using a sausage syringe or a meat grinder attachment and you can begin heat treatment.
6. Heat treatment:
6.1. Roast in the oven at 90ºС for 20-30 minutes.
6.2. In a saucepan, heat the water to 80ºC and lower the sausage bars into the saucepan; the water should not boil. Insert a thermometer into one of the sausage loaves. Cook until the temperature inside the loaf reaches 69-70ºС. As soon as the temperature inside the loaf is reached, take it out and cool it with cold water.
7. After cooling, place in the refrigerator for 12 hours to ripen.
Our reality is that the quality of sausages sold in stores suffers greatly. But if you care about your health, have the desire and free time, then you can cook sausage at home. For example, doctor’s sausage, so beloved by everyone, is very easy to prepare at home. And most importantly, you can even feed your children with it. Since there are many recipes for doctor’s sausage, we will focus primarily on the version of its preparation in accordance with GOST.
Composition of doctor's sausage according to GOST
So, to prepare such a dish you will need the following ingredients:
- beef pulp - 250 g;
- lean pork pulp - 700 g;
- natural milk - 200 g;
- one egg;
- sugar - 3 g;
- salt - 2 g;
- ground cardamom - 0.5 g.
Preparation of minced meat
Beef and pork meat must be minced twice. The first time with a large mesh, the second - with a fine one. Add spices (cardamom, sugar, salt) to the minced meat. Mix everything thoroughly.

Next, add the egg and milk. Beat the minced meat with a blender. The result will be a viscous mass. The main thing is not to worry about the color of the sausage. After all, you will get a natural color (without dyes). Place the prepared mass in the refrigerator and keep it there for about an hour. If you want your homemade doctor’s sausage to have a pink color, you can add vodka or high-quality cognac (2 tablespoons) to the minced meat.
Preparing sausage casings
Doctor's sausage requires careful preparation of the casing. At home, you can use both artificial and natural ones. It needs to be cut into pieces of 25-30 cm. After this, the shells should be washed with warm, slightly salted water and their ends should be tied on one side with cotton twine, departing 2 cm from the edge.
A simpler option is to use a 30 cm wide baking sleeve.
Sausage stuffing
We fill our shells with minced meat. You can use a special device for this (for example, a meat grinder with the necessary attachment) for stuffing sausage. Then we form the sausages, pressing the casing tightly with our hands.

After this, we tie the shell tightly on the other side. Finally, you need to carefully examine each sausage and, if you find large air bubbles, carefully pierce them with a thin needle.
Cooking sausage
In a saucepan, you need to heat the water to 95 degrees and place the workpieces in it. Doctor's sausage is cooked at home at a temperature of 85-87 degrees for 50 minutes. The main thing to remember is that the water should never boil.
Final stage
At this stage, after cooking, the doctor's sausage is cooled immediately under running water (it will be enough to set aside just a few seconds for this process). Next, the sausage is cooled at room temperature, and then in the refrigerator.

The storage conditions for such doctor's sausage are quite simple: the temperature should be 4-8 degrees, and as for the period, it must be consumed within 72 hours.
Homemade doctor's sausage, recipe No. 2
Since sausage can be prepared not only according to GOST, we suggest that you familiarize yourself with the recipe, which requires the use of minced pork. It may be similar to “Amateur” or “Doctoral”, and this quality is influenced by the grinding of the bacon. For example, to make “Lyubitelskaya” sausage, lard cut into pieces is added to the minced meat rather than twisted.
The composition of doctor's sausage according to recipe No. 2 will be as follows:

The list of ingredients has been clarified, now you can proceed directly to the cooking process. So, first we prepare the minced meat. We thoroughly wash the meat, cut off all the films, veins and cut into pieces. Grind the pork with a blender along with garlic and onions to obtain a creamy mass. Another option for grinding meat is to use a meat grinder. And if you want to make ham doctor’s sausage, you can add larger pieces of pork (chicken) to the minced meat.
Then add the egg and mix well. Pour in the spices: black pepper, semolina, nutmeg, salt, gelatin and sunflower oil. And mix everything again to evenly distribute the added ingredients.
If there is no special form for ham, then we use a baking sleeve. Or there is another original way - use a juice or milk box as a form. After all, homemade sausage can be cooked without special equipment.
We put the minced meat into a bag (sleeve), roll it up and tie it in several places with a rope (twin) so that the sausage becomes tight.
You need to cook it for 2 hours after boiling over low heat. The water should boil slightly. And the amount of water needed is such that the bag of minced meat is completely covered.
Let's consider another option for making homemade sausage using this recipe. It can be prepared in a slow cooker. To do this, place the bag of minced meat in the slow cooker in the evening. Turn on the “Stew” or “Soup” mode. We set the time to 1 hour. And until the morning the pan will work in heating mode. The most important thing is that before cooking the minced meat in the sleeve needs to be poured with boiling water. And in the morning, we take the finished sausage out of the multicooker and cool it. Once it has cooled to room temperature, it should be placed in the refrigerator for five hours (or better yet, overnight). After this, you can treat your household to a delicious doctor’s sausage.

If you want the boiled doctor’s sausage to be a pleasant pink color, then you can add a natural dye to it, which is the juice of raw beets, and alcohol (cognac, alcohol, vodka), or rather a few spoons of it, will fix this effect.
Other cooking options
According to recipe No. 2, doctor's sausage can be prepared by baking in the oven. The only thing is that the sleeve with minced meat needs to be additionally wrapped with special foil. First, keep the sausage for 15 minutes in the oven at 180 degrees, then reduce it to 150 degrees and bake in foil for 30 minutes, after which we remove the foil and bake for another 10 minutes. But before the last 10 minutes you should pour some water into the mold.
We would like to note that no matter how you prepare boiled sausage at home, it will be much tastier than store-bought, and most importantly, much healthier for you and your entire family. Therefore, you should not spare any time or effort to preserve the health of your loved ones. After all, you can’t buy it for any money.
Doctor's sausage has a soft and delicate taste. It does not contain a lot of salt, seasonings and other additives. This sausage is great for both regular sandwiches and salads. But when buying sausage in a store, you cannot be sure that it does not contain additives harmful to the human body.
But don’t despair and give up your favorite sausage since childhood. You can also obtain this product at home. Depending on the doctor's sausage recipe, it can take from one to four hours to prepare. The ingredients vary. You can add more meat, seasonings or milk. According to the doctor's sausage recipes presented below, the dish is prepared in different ways. The sausage can be baked in the oven, cooked in a saucepan, or even in a slow cooker.
Once you try home-cooked doctor's sausage, you will immediately feel a big difference in taste from the one you buy in the store. Try to cook it, following the doctor's sausage recipe according to GOST, at home.
Products for cooking:
- Pork – one and a half kilograms.
- Beef - five hundred grams.
- Milk – two hundred milliliters.
- Eggs – two pieces.
- Ground nutmeg - one teaspoon.
- Salt - four teaspoons.
- Sugar – six teaspoons.
Sausage preparation process
- Fresh pork and beef meat must be cleaned of veins and films, cut into small pieces and passed through a meat grinder. You need to alternately twist a piece of pork, and then a piece of beef through the smallest nozzle. Place the prepared minced meat in a bowl of a suitable size. Break the eggs into the minced meat, add sugar and salt. Add nutmeg and mix thoroughly. Then pour in the milk and mix well again.
- Then place the prepared minced meat in the bowl of a food processor and grind using a blender into a homogeneous paste-like consistency. The minced meat prepared according to the doctor's sausage recipe is ready. Next, you can begin to form the loaf.
- Spread a sheet of baking paper on the work surface of the table. Place the prepared sausage mince along one edge. Carefully roll the paper with the minced meat laid out on it into a roll so that the opposite edge overlaps. Then twist the roll at one end and tie with twine. With a slight movement of your hands, squeeze out the remaining air from the sausage roll. Then tie on the other side.
- The resulting sausage roll, prepared using the doctor's sausage recipe at home, must be wrapped in several layers of cling film. After which you still need to make a strapping and secure it with an ordinary knot. This completes the preparatory process of preparing doctor’s sausage at home.
Cooking sausage
- The last thing left to do is to cook the doctor's sausage. Why you need to take a fairly large pan so that the entire sausage roll fits into it. Take water and place over high heat. After boiling, place the prepared sausage roll in it, reduce the heat and cook for an hour and a half until fully cooked.
- The cooked doctor's sausage must be removed from the water, allowed to cool and placed in the refrigerator for about ten hours. After this, it can be eaten. Boiled doctor's sausage prepared according to this recipe is tasty, healthy, without the addition of dyes, flavors, sodium gluconate and other substances harmful to the human body.
Doctor's sausage in a slow cooker
Now on store shelves in meat departments you can find a huge assortment of all kinds of sausages. They have a bright appearance and beautiful packaging, but the quality of the product leaves much to be desired. But if you still want to please yourself and your loved ones with a couple of sausage sandwiches and not worry about their health, you can cook it yourself. The recipe for the most delicious homemade doctor's sausage in a slow cooker is perfect for this.

What you will need for this:
- Chicken fillet – one kilogram.
- Eggs - four pieces.
- Cream - four hundred milliliters.
- Garlic – two cloves.
- Beetroot juice - five tablespoons.
- Pepper.
- Salt.
Sausage making
- Wash the chicken fillet, cut into small cubes and pass through a meat grinder. Then place the ground chicken in the bowl of a food processor and pulse. Add beetroot juice, peeled garlic cloves, egg white and cream to the minced meat. Pepper, salt and beat again until the mixture has a homogeneous consistency. Place a sheet of baking foil on the table and place the prepared chicken mixture on it.
- Next, you need to form a loaf of future homemade sausage. To do this, carefully wrap the chicken mixture in foil and tie it with thread at both ends. Then put two baking sleeves on the resulting sausage loaf and tie it again with thread. Under no circumstances should you forget to tie the sausage. This is done to prevent water from getting inside during the cooking process. Preliminary preparation of doctor's sausage at home has been completed.
- After this, you need to take a multicooker and place the sausage in its bowl, pour boiling water so that the sausage is completely covered with water. Close the lid. Set the extinguishing mode and set the timer for one hour. When the sausage is ready, open the lid, release steam and remove the sausage from the multicooker. Let it cool completely and put it in the refrigerator for ten to twelve hours. After the required time has passed, homemade doctor’s sausage can be safely cut and made into tasty and healthy sandwiches.
Doctor's sausage cooked in mugs
By using the original recipe for homemade doctor's sausage, cooked in mugs, you will end up with a healthy and high-quality product. This sausage is perfect for making sandwiches, it can be fried with eggs, and can also be used as one of the ingredients in a variety of salads.

What products will you need:
- Pork meat - five hundred grams.
- Chicken breast - five hundred grams.
- Eggs – two pieces.
- Garlic – ten cloves.
- Milk – eight hundred milliliters.
- Starch - four tablespoons.
- Salt - four teaspoons.
- Sugar – one teaspoon.
- Nutmeg - half a teaspoon.
- Black pepper - half a teaspoon.
- Cardamom - half a teaspoon.
- Coriander - half a teaspoon.
- Paprika - half a teaspoon.
Preparing the ingredients
- Clean the purchased meat from veins, cartilage, and films. Wash and cut into pieces. Pass through a meat grinder, and then place the resulting minced meat in a blender bowl, close the lid and beat.
- Next, in any order, place all the spices, starch, sugar, salt, peeled and chopped garlic into a blender with the beaten minced meat, as well as pour in the milk and add the egg.
- All the necessary ingredients for the doctor's sausage recipe at home are in a blender. Now you need to thoroughly beat all the products to a light, homogeneous consistency.
Filling mugs with sausage
- Then you need to take preferably glass mugs. The number of mugs directly depends on their size. Grease all the mugs well with vegetable oil and place the prepared minced meat for the doctor's sausage in them, not reaching the edge of the mugs about three to four centimeters. Each mug filled with minced meat must be tightly covered and then wrapped with several layers of cling film. This must be done so that the minced meat does not leak out during the cooking process.
- After all the mugs have been carefully and tightly packed with cling film, they need to be placed in a wide pan. But before that, be sure to place a wire rack on the bottom of the taken vessel and cover it with cotton cloth. This is done so that the cling film with which the mugs are wrapped does not come into contact with the iron bottom. A pan with mugs of minced meat placed in it must be filled with tap water so that the mugs are immersed in water to two-thirds of their height.
- Cover the pan with a lid and place on the fire. Bring to a boil, reduce heat and simmer. After one hour, turn off the heat, remove the mugs from the pan, remove them from the film, turn them over and take out the finished doctor’s sausage, prepared at home.
- It looks paler in color than store bought. But this is compensated by the fact that such sausage is very tasty, aromatic, healthy and, of course, does not contain substances harmful to human health.
- Among the wide variety of existing recipes with photos of doctor’s sausage prepared at home, you can choose any one to suit your taste.
Homemade doctor's sausage in the oven
We invite you to consider in detail one of the recipes - this is homemade doctor's sausage in the oven.

Ingredients
- Beef - five hundred grams.
- Lean pork - two kilograms.
- Eggs - three pieces.
- Powdered milk – forty grams.
- Cognac – twenty-five grams.
- Nutmeg - one tablespoon.
- Sugar – one tablespoon.
- Cardamom - one teaspoon.
- Salt - two tablespoons.
- Water – half a liter.
Cooking doctor's sausage
- Separate the meat from films and veins, rinse well and cut into pieces. Pass through a meat grinder with a fine nozzle. Then place the minced meat in the bowl of a food processor and pulse.
- Now, one by one, you need to add all the ingredients prepared according to the recipe to the minced meat. And once again beat everything well in a blender until the gray airy mass has a homogeneous consistency.
- The gray color of the prepared meatloaf should not bother you; it will change as it bakes. Homemade doctor's sausage is prepared according to this recipe without intestines, but using a baking sleeve.
- Fill the baking sleeve with the prepared minced meat, tie it with twine and also be sure to wrap it in foil for baking. Cover the baking sheet with a sheet of foil and place the sleeve with minced meat on it.
Let's start baking the sausage
- The oven should be preheated to a temperature of 180 degrees. Place the baking sheet in the oven for twenty minutes, then reduce the temperature to 150 degrees and continue baking for another forty minutes. Then remove the foil from the sleeve, pour a small amount of water into the pan and leave in the oven for another fifteen minutes.
- Cool the finished doctor's sausage, prepared at home with your own hands, to room temperature and place in the refrigerator for seven to eight hours. After which you can take it out of the refrigerator and prepare delicious and healthy sandwiches. It is worth noting that no matter which recipe and method you choose to prepare doctor’s sausage, it will in any case be tastier and healthier than purchased in a store.