DIY chicken figurine made from mastic. DIY: Making Easter chicks from fondant. Making fudge for Easter cake
Video content entitled "" was posted by the author "Funny Dylan Funny Dylan" 3 year. ago, it was already watched 2,147 times. The video was liked by 26 and disliked by 3 users.
Description:
Together with Dylan we make Easter chicks from mastic.
The chickens turn out very tasty. Children eat them with pleasure. You can also make these chickens out of plasticine - but then you can’t eat them)))
Mastic chickens are an excellent decoration for the Easter table.
We hope you enjoy our Master Class.
Mastic recipe:
Compound:
marshmallows - 90-100 g (one pack of marshmallow candies),
lemon juice or water - ~1 tbsp. spoon,
powdered sugar - ~1-1.5 cups
Add a tablespoon of lemon juice or water to marshmallows of the same color and heat in the microwave (10-20 seconds) or in a water bath until they increase in volume.
Then add sifted powdered sugar in portions and stir the mixture with a spoon or spatula.
When it becomes difficult to stir with a spoon, place the mixture on a table sprinkled with powdered sugar and continue kneading with your hands until the mastic stops sticking to your hands.
Wrap the resulting mastic in cling film or a thin plastic bag (so that the film fits tightly on all sides to the mastic and air does not get inside the bag) and put in the refrigerator for ~30 minutes.
Remove the finished mastic from the refrigerator, place it on a table sprinkled with starch and roll out thinly.
From the finished mastic you can make various figures, flowers, leaves and roses for cakes or cover the cake with thinly rolled mastic. Video source youtube.com/watch?v=Eq_HvBXldwk
This video about modeling can be viewed online, as well as downloaded absolutely free and without registration in almost any video format: mp4, x-flv, 3gpp and so on. You just need to click on the “Download” button at the top of the site and move the slider to the right. In addition, you can watch other educational video about modeling from plasticine, salt dough, clay, and so on from the author of Funny Dylan, Funny Dylan, which are also posted on our website, as well as other similar educational videos about modeling, crafts, materials, art, and the like. If you need a mobile version of this video, then our website has a modern responsive design and is suitable for any mobile device: tablets, smartphones, phones, and so on.
This master class tells how to make chickens sitting together in a nest made of mastic for decorating a cake, or. Using the proposed master class, you can easily make chickens with your own hands. When you sculpt figures, you will seem to return to childhood and remember how you used to sculpt from plasticine. You will surely like it.
Ingredients and Tools:

Recipe for making mastic chicken:
- Start by kneading the yellow mastic. Knead with warm hands until it becomes soft and pliable. Roll two balls with a diameter of 7 cm from the mastic.

- Roll the balls on a silicone mat and shape them into cones with a blunt, rounded tip.

- Stand the cones upright and press them together at the top until you have something that looks like two pears.

- Pull out the top of one pear. This will be the “crest” of the chick – a girl.

- Using scissors, cut the “tuft” in two places.
- Use your fingers to draw out the back of the figures; these will be the “tails”.

- Using scissors, cut the “tails” in several places. Moreover, you can do this in different ways. Make horizontal cuts in one chicken and vertical cuts in the other.

- In order to make “wings” for the “chickens”, roll a rope of mastic with a diameter of 2 cm and a length of 12 cm.

- Cut it into 4 parts.

- Roll each piece into a cone.

- Roll out the cones with a rolling pin. To make something like leaves. These will be “wings”.

- Make cuts at the ends of the “wings” with scissors.

- Brush the rounded parts of the “wings” with water using a brush. Water will make the mastic sticky and the “wings” can be “glued.”

- Glue the “wings” to the bodies of the “chickens”. This is what “chickens” with “wings” look like.

- Roll 4 small balls with a diameter of 3 mm from brown mastic. These will be the “eyes” for the chickens.

- To make it easier to glue the “eyes”, prick them with a toothpick, coat one side with water and glue them in place.
- To dye white fondant red, dip a toothpick in food coloring and pierce a piece of white fondant with it several times. Knead the mastic with your hands until it acquires a uniform color. The more dye you add, the more intense its color will be.

- From red mastic, fashion two small cones 8-9 mm long, these will be the “beaks” of the “chickens”.

- Lubricate the base of the cones with water and glue the “beaks”.

- Cut out the crest of one chicken. To do this, roll out a piece of red mastic, cut out a rectangle 15 mm long and 4 mm high. Cut cloves on one long side. Grease the lower part of the “tuft” and glue it to the top of the “chicken-boy” head.

- The chickens are almost ready, all that remains is to make their “legs”. Roll a flagellum with a diameter of 8 mm and a length of 6 cm from red mastic.

- Cut the flagellum into 4 parts, slightly flatten each one, cut out triangles on one side, imitate the shape of the “legs,” and glue them.

- Now make a "nest". Roll out the brown mastic into thin flagella, tear the flagella with your hands and scribble chaotically, imitating a “nest”.

- Place the "chicks" in the "nest"

- Easter decoration is ready.
Master class from Milena
But we are craftsmen and we ourselves can also fashion or cut out unique handmade jewelry from ready-made marzipan mass or sugar mastic, which is quite simple to prepare.


The sprinkles and icing that are sold in stores for Easter will make your Easter cakes look like hundreds of others, despite the fact that you put the warmth of your soul and hands into homemade baking.

Therefore, we suggest making a simple and effective decoration with your own hands in the form of delicate flowers from mastic. Mastic is very easy to make from marshmallow chewing candies by heating them in the microwave. All that remains is to roll out the mastic dough and cut out circles of different diameters from it. And it won’t be difficult to roll up cute flowers or roses from the blanks!


How to decorate Easter cake with mastic flowers - here
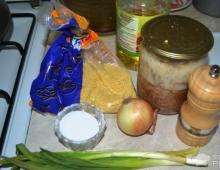
For decoration, we will prepare marshmallow mastic from chewing candies.
Heat the marshmallow-like candy known as marshmallow for a few seconds in the microwave along with the sweet butter.
Dissolve food coloring in a small amount of water and color two halves of the heated marshmallow red and green.
Adding powdered sugar, mix plastic mastic, from which we sculpt whatever your heart desires - in my case, these are roses.


To and prepare roses, roll out the mastic thinly,cut into circles with a mold


and from them collect buds of the desired size, periodically wetting the base with water.With leaves it’s even easier - roll out the mastic and cut out the blanks with a mold.
For sugar mastic:
Soak the gelatin packet in water until it swells. Combine gelatin with powdered sugar and knead the mixture to a consistency similar to plasticine.
. Tint the mastic with ready-made food or natural dyes - add beetroot, carrot or blueberry juice.
From the plastic mass you can easily get whatever you want, for example, a flower with leaves. To do this, divide the mastic into pieces, roll into balls, then knead with your hands. You can make a rose from the blanks by collecting them one petal at a time (as in the photo). Using a knife, cut out the leaves from green mastic, and apply the veins with the edge of a teaspoon.
Decorations for ordinary cakes are also made from this mastic.

Master class on Easter cake dyeing step by step here

For the sugar fudge:
- Gelatin - 10 g
- Powdered sugar - 300 g
- Water - 150 ml.
For mastic:
- Chewing marshmallows - 0.5 packs
- Powdered sugar - 400 g
Making fudge for Easter cake
Let's start preparing the fudge. To do this you need to take: water, gelatin and powdered sugar. 
We breed 10g. gelatin with 150 ml. water and from 1 hour. spoon of lemon juice and leave the gelatin to swell for 20 minutes.

Now add 300g of powdered sugar to the gelatin. 
Mix everything and put it in the refrigerator. Before greasing the Easter cake, you need to heat the sugar mixture for 10 seconds in the microwave. 
Grease the cake with a brush or spoon. 
Preparing mastic for Easter cake decoration
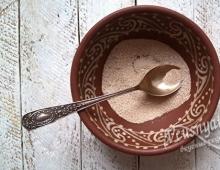
Leave the cake and get to the mastic. To do this, we need chewing marshmallows - half a pack and powdered sugar - 400 g. 
Chewing marshmallows need to be melted in the microwave for 10-15 seconds. 
Gradually add powdered sugar. 
Knead the mastic until it becomes an elastic mass. 
Since marshmallows have more of a pink color, the mastic turned out to be this color.

Wrap the mastic in cling film and let it sit for a while. 
We will need several different colors, food paint will help us with this. Pour some paint onto the mastic and drip water onto it.


As a basis, I took a ready-made chicken, the kind I buy at the market before every Easter. I really wanted to do something similar: the same size and, if possible, the same cuteness.
I didn’t knead the mastic too tightly so that it wouldn’t be difficult to sculpt. It was exactly like plasticine in consistency.

I rolled two small pieces of mastic into small balls and compared them with the size of the purchased bird.


The store-bought chicken has a bow, legs with a beak, and wings made with a pastry bag. I’m not so skilled with a syringe and a bag. to make such small and neat details, and there is no time, so I quickly found a way out of the situation.
I had sprinkles available, including “flowers” and “hearts”. So, to make the beak, I broke the heart in half, and it turned out to be a wonderful bird’s nose. I made a comb for the boys from a whole flower or heart, placed vertically. The paws are also made of flowers. The eyes are from black peas selected from Easter sprinkles. The chick girls' bows are also made of flowers!
I made the wings from small pieces of mastic. Since the consistency of the mastic was quite successful the first time, the parts easily stuck together and at the same time kept their shape and did not deform. If your parts do not stick together, fasten them with vodka or water!

With this decision regarding the use of sprinkles, the process of making chickens went much faster for me than I initially expected.
Then I wanted to make small green “clearings” on which the chicken would sit, just like the store-bought one. To do this, I diluted the Easter glaze by whipping it with egg white and adding coloring. This output was not very bad, but not great either.

To prevent these green “blobs” from sticking to the tray, I generously sprinkled it with starch. However, in several places these things still stuck and when I tried to cut them off from the tray, they partially crumbled, because this glaze is very crumbly.

This is how the chickens turned out: quickly, beautifully and inexpensively.


This is how you make a daffodil
Daffodil from mastic. Master Class

For you, a master class on making daffodils from mastic with step-by-step photos.
To work we need:
- sugar mastic
— cutting for mastic — “Petunia”
— modeling stacks for working with mastic
- rolling pin for working with mastic
— silicone mat for working with mastic
- yellow gel dye
- tray for drying flowers with cells
- stamens for decorating flowers

How to do:
1. Roll out the mastic in a layer of approximately 1.5-2 mm. We cut out the base of the future flower using a Petunia die cutter.

2. Place the flower on a soft mat and, using a tool from a set of stacks, slightly pull out the petals of our flower in the direction from the center, then draw along the edge of the petal with another tool from the same set, making its edges wavy.


3. We form the relief of the future flower, draw a line along the middle of the petal from the edge to the center. Place the workpiece on a tray with cells.

4. Making the daffodil core. To do this, paint a piece of mastic yellow with gel dye. Roll out the ball and place it on a cone-shaped stick from a set of stacks. We form a cone and roll out its edges on the table.


5. Trim the edges using a pastry cutter. On a soft mat we create wavy edges around the workpiece.

6. Wet the core of the flower with vodka or alcohol and glue the yellow center to its base. Finally, we carefully attach the stamens to the daffodil.
Bunny figurine for cake decoration
Master class on top of mastic cake

Every housewife wants her Easter cake to be the most delicious and beautiful. Now in stores there is quite a large assortment of decorations made from sugar mastic. And chickens with eggs, and all kinds of spring flowers, multi-colored sprinkles and chocolate chips, silver and gold dragees, not even everything remember. And when our Easter cakes are ready and the time has come to decorate them, then I advise you to show your creative imagination in full force and make some decorations yourself,After all, everything that is made with one’s own hands is always tastier and more enjoyable.In this article, I have collected for you some tips on creating decorations for Easter cakes with your own hands, I hope that they will help make your Easter cakes the most delicious and beautiful, for which you will not have to blush.

Mastic is very easy to make from marshmallow chewing candies by heating them in the microwave. All that remains is to roll out the mastic dough and cut out circles of different diameters from it. And it won’t be difficult to roll up cute flowers or roses from the blanks!

If you have ready-made plungers for cutting out flowers and leaves, then this is a big plus - quickly and efficiently. But if there are no such forms, then you can sculpt the flowers and figures yourself.
Preparing mastic for decoration coolie cha
To do this, we need chewing marshmallows - half a pack and powdered sugar - 400 g.
Chewing marshmallows need to be melted in the microwave for 10-15 seconds.
Gradually add powdered sugar.
Knead the mastic until it becomes an elastic mass.
Since marshmallows have more of a pink color, the mastic turned out to be this color.
Wrap the mastic in cling film and let it sit for a while.
We will need several different colors, food paint will help us with this. Pour some paint onto the mastic and drip water onto it. 

Master class roses
Dissolve food coloring in a small amount of water and color two halves of the heated marshmallow red and green.
Adding powdered sugar, mix plastic mastic, from which we sculpt whatever your heart desires - in my case, these are roses.
To and prepare roses, roll out the mastic thinly,cut into circles with a mold
and from them collect buds of the desired size, periodically wetting the base with water.With leaves it’s even easier - roll out the mastic and cut out the blanks with a mold.
We make circles. The sizes of the circles are different - see photo.
We overlap the circles - see photo.
We twist the circles into a rose and straighten the petals.


Or we twist a mini rose like this

Roll out pink mastic in a layer of 2-3 mm. Using a round cookie cutter, cut out 6 circles. Place them together overlapping and press the mastic with the stack. This will hold the circles together.
Roll the mastic circles into a roll and cut it into two parts exactly in the middle. You have two flowers ready. You just need to trim them to give the bud a round shape, and do a little work with the petals. Stretch the edges of the petals a little and bend them back to give them a natural look.

Easter chickens made from mastic - Master class

I didn’t knead the mastic too tightly so that it wouldn’t be difficult to sculpt. It was exactly like plasticine in consistency.
I rolled two small pieces of mastic into small balls and compared them with the size of the purchased bird.

The store-bought chicken has a bow, legs with a beak, and wings made with a pastry bag. I’m not so skilled with a syringe and a bag. to make such small and neat details, and there is no time, so I quickly found a way out of the situation.
I had sprinkles available, including “flowers” and “hearts”. So, to make the beak, I broke the heart in half, and it turned out to be a wonderful bird’s nose. I made a comb for the boys from a whole flower or heart, placed vertically. The paws are also made of flowers. The eyes are from black peas selected from Easter sprinkles. The chick girls' bows are also made of flowers!
I made the wings from small pieces of mastic. Since the consistency of the mastic was quite successful the first time, the parts easily stuck together and at the same time kept their shape and did not deform. If your parts do not stick together, fasten them with vodka or water! 
With this decision regarding the use of sprinkles, the process of making chickens went much faster for me than I initially expected.
Then I wanted to make small green “clearings” on which the chicken would sit, just like the store-bought one. To do this, I diluted the Easter glaze by whipping it with egg white and adding coloring. This output was not very bad, but not great either.
To prevent these green “blobs” from sticking to the tray, I generously sprinkled it with starch. However, in several places these things still stuck and when I tried to cut them off from the tray, they partially crumbled, because this glaze is very crumbly.

This is how the chickens turned out: quickly, beautifully and inexpensively.
For sugar mastic on gelatin:
Soak the gelatin packet in water until it swells. Combine gelatin with powdered sugar and knead the mixture to a consistency similar to plasticine.
. Tint the mastic with ready-made food or natural dyes - add beetroot, carrot or blueberry juice.


From the plastic mass you can easily make whatever you want, flowers or figures. To do this, divide the mastic into pieces, roll into balls, then knead with your hands. You can make a rose from the blanks by collecting them one petal at a time (as in the photo). Using a knife, cut out the leaves from green mastic, and apply the veins with the edge of a teaspoon.
Decorations for ordinary cakes are also made from this mastic.


Daffodil from mastic - Master class


To work we need:
- sugar mastic
— cutting for mastic — “Petunia”
— modeling stacks for working with mastic
- rolling pin for working with mastic
— silicone mat for working with mastic
- yellow gel dye
- tray for drying flowers with cells
- stamens for decorating flowers

How to do:
1. Roll out the mastic in a layer of approximately 1.5-2 mm. We cut out the base of the future flower using a Petunia die cutter.

2. Place the flower on a soft mat and, using a tool from a set of stacks, slightly pull out the petals of our flower in the direction from the center, then draw along the edge of the petal with another tool from the same set, making its edges wavy.

3. We form the relief of the future flower, draw a line along the middle of the petal from the edge to the center. Place the workpiece on a tray with cells.

4. Making the daffodil core. To do this, paint a piece of mastic yellow with gel dye. Roll out the ball and place it on a cone-shaped stick from a set of stacks. We form a cone and roll out its edges on the table.
Easter is a special, bright holiday. We carefully prepare for it, come up with dishes. I want to bring the best to the table. In addition to the traditional Easter, it is customary to prepare many other desserts for the holiday. They are decorated with symbolic decorations: greenery, mastic figures in the form of chickens, eggs, rabbits and much more. I suggest you prepare a stunningly beautiful Easter dish. These are Chicken mastic cakes.
The dessert looks charming both on the holiday table and in an Easter basket. This is a wonderful gift for friends, colleagues, and relatives. Decorating is so easy that you will be surprised. And you can purchase everything you need in the online store. The variety of confectionery products and affordable prices will pleasantly surprise you.
To prepare you will need:
- ready-made cakes or muffins;
- red and yellow;
Chicken cake dessert recipe
- Cupcakes or small cakes are suitable for decoration. If you use cakes, cover the top with a cream suitable for mastic (butter or butter). Place each brownie in a paper pan.
- Color the fondant a bright rich yellow or use yellow colored fondant. Roll it up. Use a cutter to cut into cubes. Roll each cube into a ball. This will form the basis for the chickens.


- We glue paws made from yellow mastic to the bottom of the cakes. You don't have to add paws, it's whatever you like.

- The end result is these fun holiday desserts.

The dessert recipe is incredibly simple and affordable. This Easter dish will cause a lot of positivity with its appearance. I wish you happy holidays and creative inspiration!